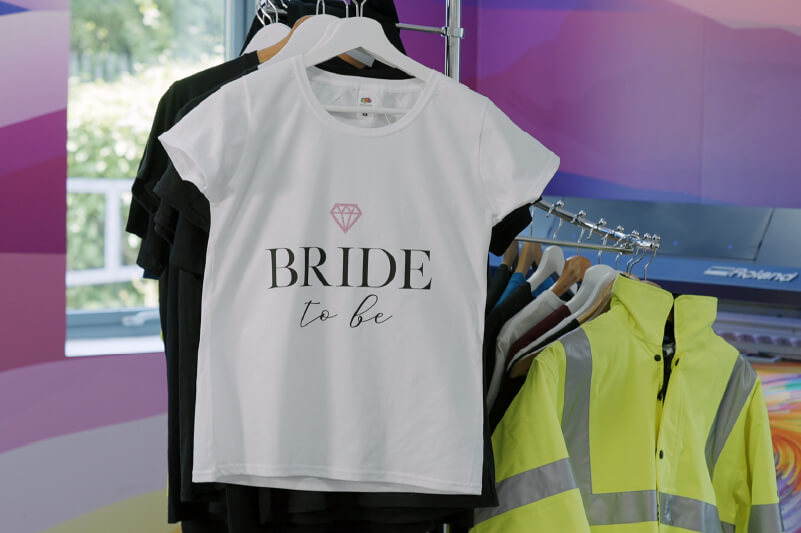
We’ve been looking at the wedding market to find inspiration for print applications which you could be selling right now. There’s a lot of opportunity, with the global wedding industry projected to be worth $128 billion by 2026, growing at a CAGR of 4.9% from 2021 to 20261. But the festivities usually start well before the big day with hen parties filling up the calendar every month
Among the items on the bride-to-be’s party list are customised t-shirts for everyone involved. In this article, we’re looking at a classic t-shirt, featuring everyone’s favourite: GLITTER!
Equipment used:
- VersaSTUDIO GS2-24 vinyl cutter
- Black HTV (heat-transfer vinyl)
- Glitter-effect HTV
- Adobe Illustrator
- VersaWorks 6 RIP software
The Artwork
- First, we needed inspiration for our designs. There are a lot of options out there in online marketplaces like Amazon and Etsy and we realised quickly that glitter was a popular option for brides-to-be and their entourages, so this was a good principle to guide the design.
- We kept the design simple and chose a premade design from a stock images store. As we were going to use a vinyl cutter, the exported file needed to be in vector format and luckily the stock library provides a filter allowing users to show only vector designs in the search results. Bear in mind: if you are using stock assets of any kind to produce sellable items, be sure to check the terms of the license and ensure that you are allowed to use the assets for commercial purposes.
- The design we chose features two colours – letting us demonstrate how to produce a heat transfer T-shirt with two different types of vinyl.
- To keep things simple, we didn’t choose a design with editable text, although this could be very useful if you plan to offer personalised hen-do T-shirts.
- On closer inspection, we discovered that the diamond icon (the glitter element in the T-shirt) was composed of several tiny shapes. This would not be an easy job to cut, so we had to redraw the outline using a mix of Adobe Illustrator’s drawing tools including the Rectangle tool and the Shape Builder tool.


Cutting the Vinyl

- The files were exported as separate PDF files – one for each colour of vinyl. The vinyl cutter we were using, the VersaSTUDIO GS2-24, comes with its own software – CutStudio – but we chose to use VersaWorks 6 RIP to manage the process. This was simply a matter of convenience as all the machines in our Creative Centre are run from the same RIP platform.
- The two types of vinyl we were using were of different thicknesses, so this required setting each one up separately, making test cuts and calibrations before starting the cutting process. When you are calibrating your vinyl cutter, it will produce a test cut – in this case it will cut a square with a cross inside it. If you can remove the square section without also removing the cross, and the backing sheet is not also cut, your setting should be correct.
- Most types of heat transfer vinyl are produced with the outward-facing side attached to the backing sheet, letting you apply it directly to the garment without needing to first transfer it onto a heat transfer application film. In practice, this means that your designs should be mirrored before cutting so they appear in the correct direction once applied.
- Once both colours of vinyl were cut, we trimmed the designs from the roll and carefully weeded off the excess.


Applying the Heat-transfer Vinyl
- The next step was to apply the vinyl to our T-shirt using a heat press. These are available in many configurations but for T-shirts, it’s best to go for a clamshell design with rectangular upper and lower platens.
- Before pressing your designs, you will need to consider two things: the temperature and the pressing time. This will be determined by the material of the garment and the figures recommended by your media supplier depending on the type of vinyl you use. If you are unsure, it’s a good idea to test at a lower temperature for a longer time. For this application, we set the temperature at 153°C (~307°F) for 14 seconds.
- Once the heat press had reached the right temperature, we pressed the garment for a few seconds – this heats the fabric up for more effective adhesion and removes any creases.
- With the T-shirt still on the platen, we placed both sections of vinyl where we wanted them and locked the press in place for the required duration.
- Once the pressing was completed, we removed the backing sheet to see the result. Be aware that some heat transfer applications require that you leave the garment to cool before removing the backing sheet. This is often referred to as ‘cold peel’.


Conclusion

As you’ve seen, making personalised t-shirts with a vinyl cutter is an easy process and, with such a wide range of vinyl types available, you can take your creativity in new directions. You can even use a printer/cutter to print photo-quality graphics onto heat-transfer vinyl or invest in a DTF printer to cut out the weeding process.
See our page on T-shirt printing to learn more or get in touch with a Roland expert who’ll gladly help you choose the best option for you.
1. ResearchAndMarkets. "Wedding Industry - Global Outlook and Forecast 2021-2026." October 2020.
